

By. Silent J
Greetings grasshoppers. This tutorial is going to be a
little long so I’ll divide it in two parts. This one will show you how to
prepare your Photoshop file. It doesn’t sound very exiting, but it’s a very
important step before you get to work. I hope you saved the drawing from the
last tutorial, because you’ll be using it in these two tutorials. Things that
you will need today:
1.
A computer (PC or Mac, your choice)
2.
A scanner
3.
And a Wacom tablet.
There are different kinds of Wacom tablets you can use, each
with different features and prices. If you can spare the change, the Cintiq is
available for around $2,499. If your change consists more of pennies, you can
get a
Bamboo from about $85 to $100. (The link is a bit higher than that price
range but it’s not difficult to scour eBay for a good deal.) If you’re out of
pennies, then you can use a regular mouse but bear in mind that the same
results won’t be the same.
4.
Oh, and Adobe Photoshop.
Step one: Scan
your work
Make sure to scan your art at a resolution of at least 300
dpi. I can’t really go to detail on how to scan cause all scanners are
different, so you’ll have to play with it on your own to find out how it works.
Step two: Make a
new file
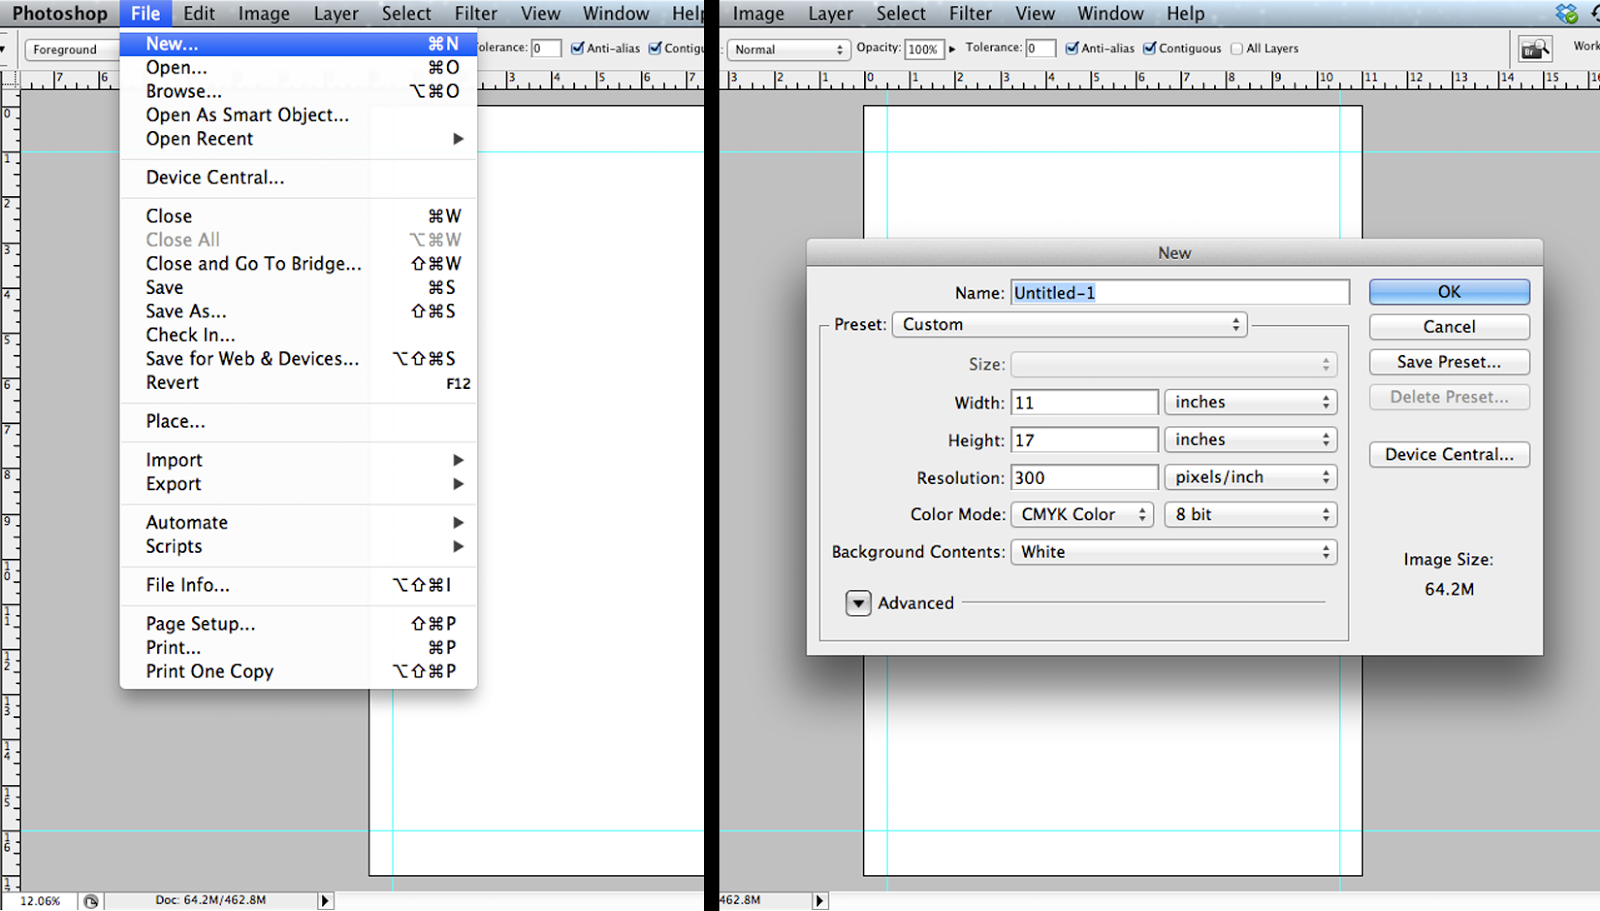 For those not too familiar with Photoshop, go to
File>New. Next, put the size that you want. I personally use 11”x17”, the
standard size for comic books. The resolution, as always, should be 300 dpi. If
you're going to print it, the color mode should be CMYK, but, if you just want
to keep it digital or to upload on a website like deviantArt, go for RGB.
For those not too familiar with Photoshop, go to
File>New. Next, put the size that you want. I personally use 11”x17”, the
standard size for comic books. The resolution, as always, should be 300 dpi. If
you're going to print it, the color mode should be CMYK, but, if you just want
to keep it digital or to upload on a website like deviantArt, go for RGB.
After that, place your art on the file by clicking
File>Place and choose your art.

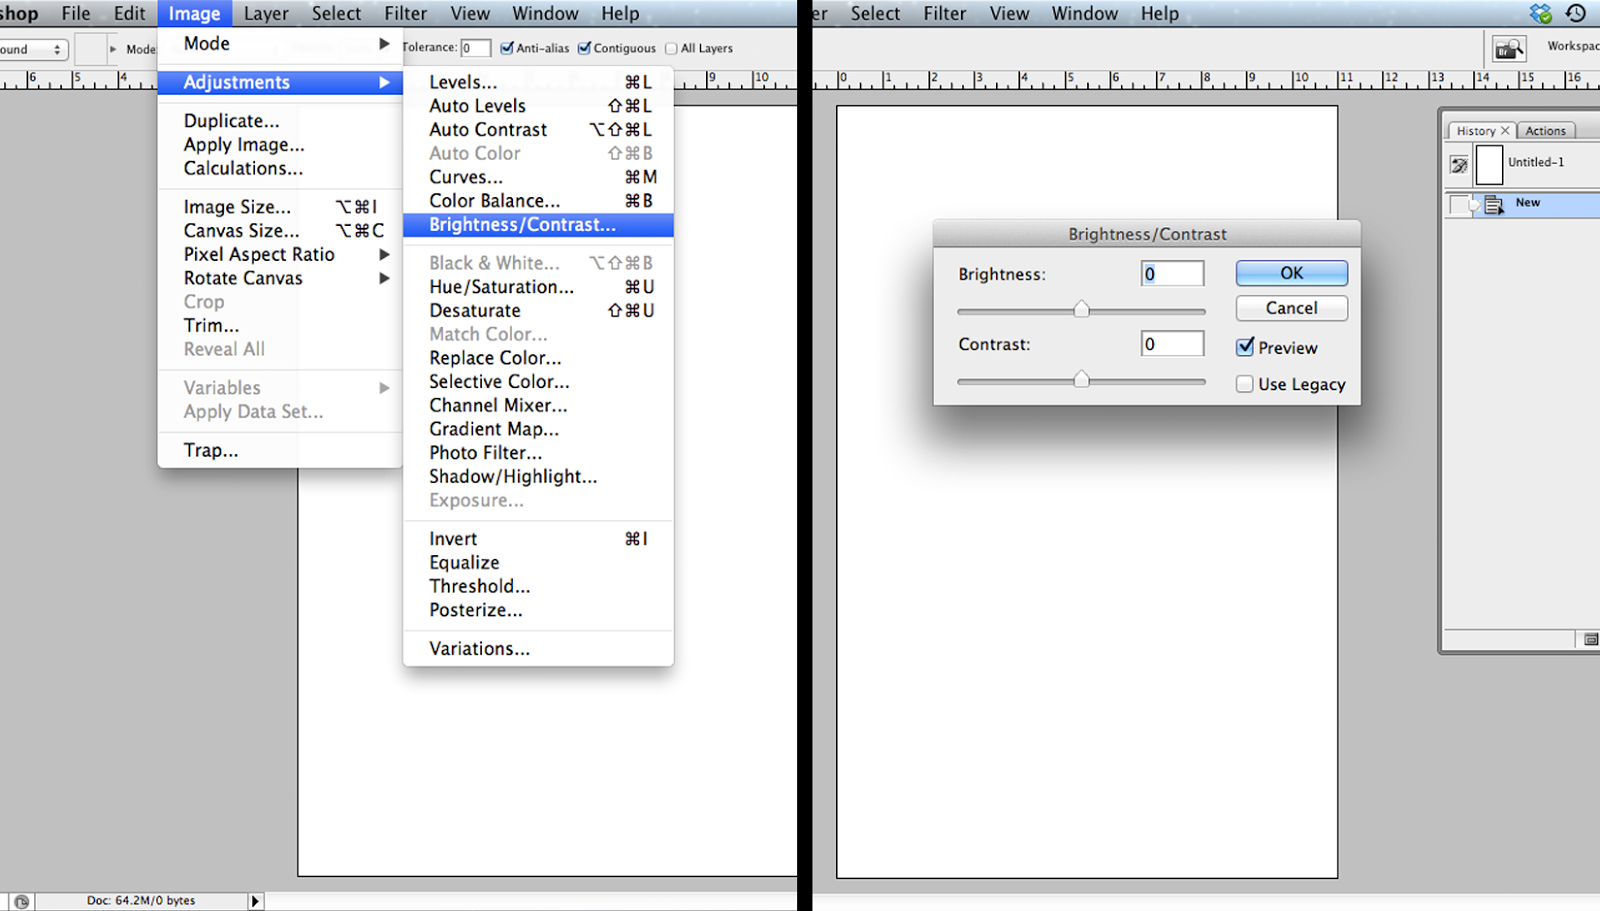 Once you’re done with that,
place the art however you want. The art might not look dark enough, so to fix
that, go to Image>Adjustments>Brightness/Contrast. There, play with the
sliding bars until you make it as dark as you want.. If you need to
clean up the art, use the brush tool with white.
Once you’re done with that,
place the art however you want. The art might not look dark enough, so to fix
that, go to Image>Adjustments>Brightness/Contrast. There, play with the
sliding bars until you make it as dark as you want.. If you need to
clean up the art, use the brush tool with white.Step Three: Separate line art from background
It’s easier said than done. But first, merge down the line
art layer with the background layer just to make sure that the art is the same size
as the file. To merge the layers, right click (Control+click on PC,
Command+click on Mac) on the art layer, and click the merge down option.

Next, double click the background layer, and when the window
appears press Okay to unlock it. The padlock icon on the layer disappears
and the layer changes to "Layer 0".


Next, go to Select>All, then Edit>Cut. Then go to the
Channel window and make a new layer (the layer should look black). In this
channel layer, click Edit>Paste to put the art.
Here comes the
tricky part though, because we want to select only the line art but it won't
work by clicking Select. What you’ll have to do is put the cursor on top of the
channel thumbnail (small square on the layer that looks like the art), then
push and hold control (command on Mac). The cursor should change to a hand with
a square on top .

Without letting go of control or command click the
channel thumbnail. If done right you selected all the space around the line art.

With this selection, we then go back to the layer window and
make a new layer. Go to Select>Inverse, then using the color black, go to
Edit>Fill. When the window pops out click Okay, and you should have your
line art background free. Make sure to fill layer 0 with white.

Finally, be sure to save this file because in part 2 we get
started with the fun part.
No comments:
Post a Comment