

By: Silent J
Greetings grasshoppers, the journey continues. Hopefully you’ve
read the first part and have your line art separated from the background. If
you don't know what I’m talking about, scroll back to the first part. Now, let’s
get to work.
Step four: Making flats
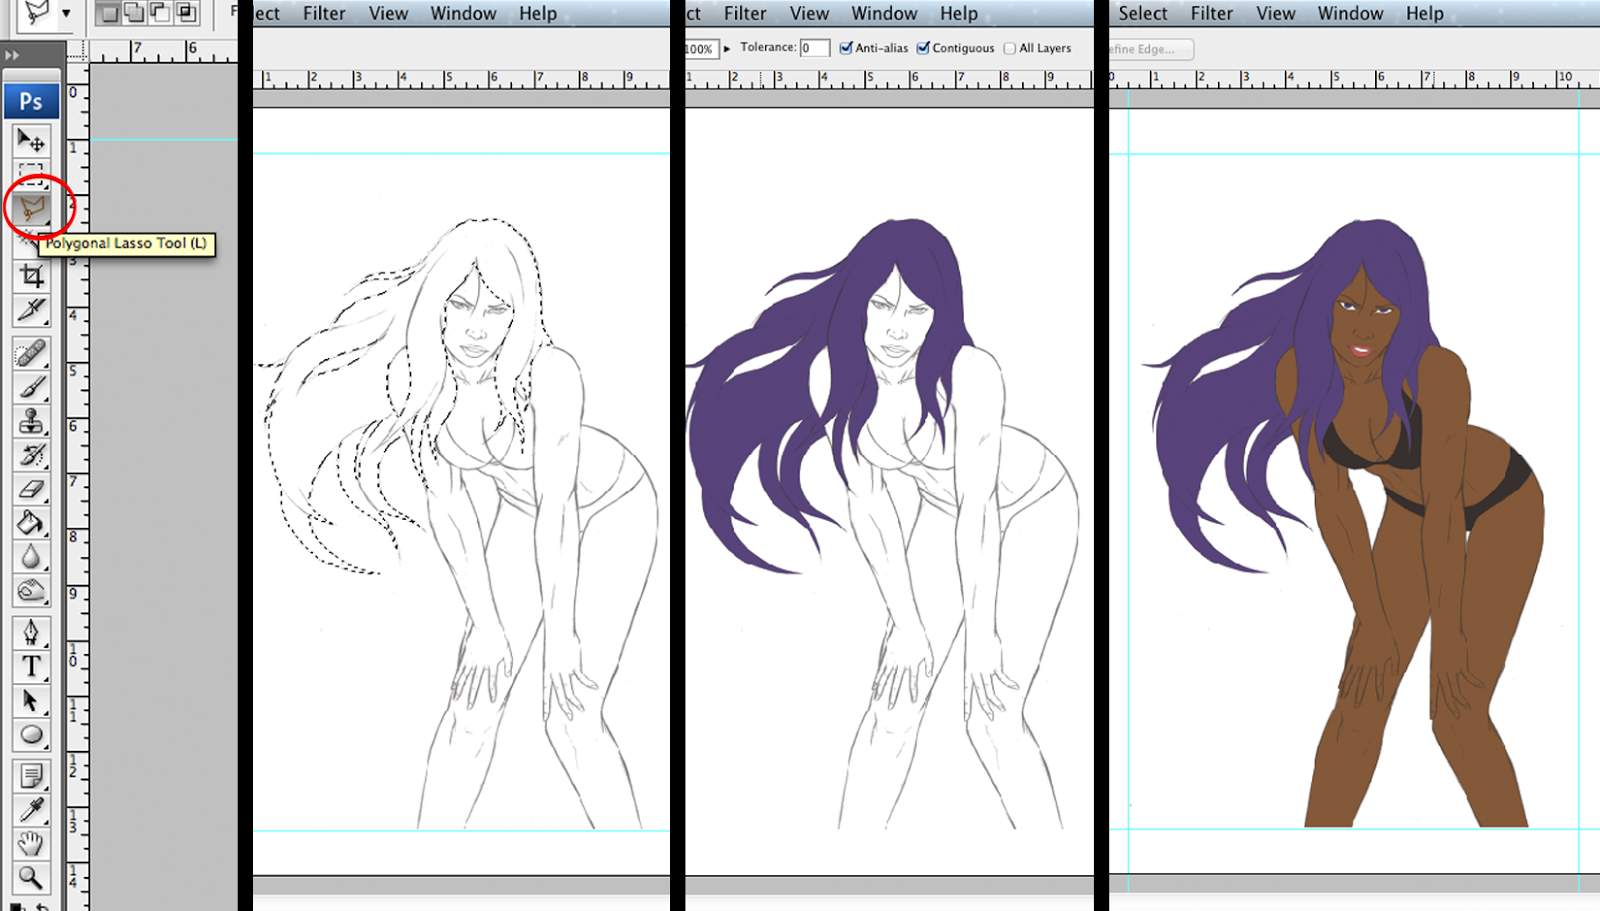 Below the line art layer, make a new layer and call
it "flats". In this layer you will select areas of your art and fill
it with a solid color. For me the best way to select the areas is using the
polygonal lasso tool. I like using medium-dark colors when filling up areas I
like. If done right, your work should look something like this. Don't
fill the background on this layer; keep it in another layer below
Below the line art layer, make a new layer and call
it "flats". In this layer you will select areas of your art and fill
it with a solid color. For me the best way to select the areas is using the
polygonal lasso tool. I like using medium-dark colors when filling up areas I
like. If done right, your work should look something like this. Don't
fill the background on this layer; keep it in another layer below
Step five: Tones
Duplicate the flats and line art layers. Merge down
the line art copy layer to the flats copy layer and name it "tones"
(right click or control + click on top of the layer to use merge down option).
The reason we're merging these two layers is because we're going to blend
everything in this layer. Make sure to turn invisible the original line art layer.
Now, we’re going to work on the light tones, but for
that we first need to establish where the light is going to come from. In my
case I decide to make it come from the top right .

Click on the flats
layer and using the magic wand tool select the area you want. I chose the face.
Go back to the tones layer and select a light tone of the flat color of the
area you chose. Select the brush tool and choose the type of stroke you want. I
suggest the airbrush soft.
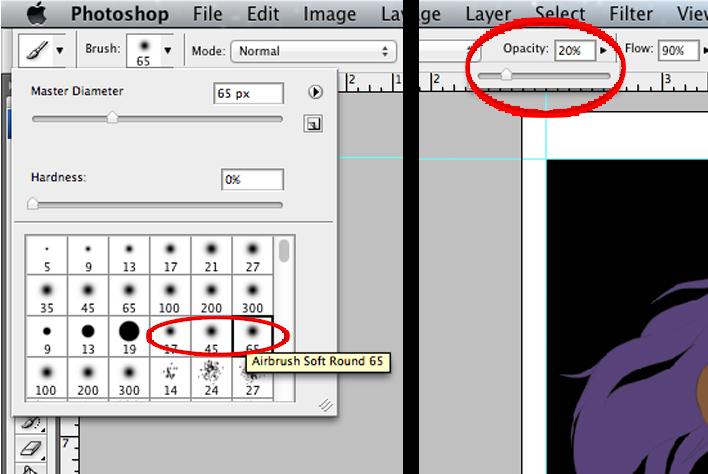 After that there's an option that says opacity, click it and take
it down to 20%. Now the brush strokes that you do on the art won't be solid
colors. The more you use the brush in the same area the more color you will put. If you don't understand that last part, just make a new file and go
crazy experimenting with the brush and lowering the opacity. You will get it
then.
After that there's an option that says opacity, click it and take
it down to 20%. Now the brush strokes that you do on the art won't be solid
colors. The more you use the brush in the same area the more color you will put. If you don't understand that last part, just make a new file and go
crazy experimenting with the brush and lowering the opacity. You will get it
then.
It’s important– like I said before– the line art blends
with the color, so make sure to paint darker over important line details like
eyebrows and eyelashes.
After the light tones, we’ll begin with the shadows.
Select a darker flat tone, but not too black. Just like light tones do the same
with the shadows. This time you’ll work on the opposite side and don't forget
to use the blur tool.
Just rinse and repeat in all the other areas.
 Step Six: Final details
Almost done! The white areas of the eyes and teeth
don't look good if you leave them flat. Give them some shadow using the light
tone of the skin. You can make a light reflection effect on the eye by raising
the opacity to 100% and by clicking on the pupil with white.
Instead of leaving the hair looking like a weird, solid
wig we can make the illusion of strands of hairs by using the brush in a
smaller size. Make strokes with different hair tones and have some of those
come out of the hair root area.

To make it look a little more interesting use a
secondary light source. Where the secondary light comes from is up to you, but
to keep it simple make it opposite of the primary light, in my case the bottom
left. In the shadow areas use any light color that you want to make the
secondary light effect.
It’s not necessary, but for the heck of it I gave the
entire figure an outer glow effect. If you want to do that select all the flats
areas and on a new layer fill them whith any color. Go to fx > outer glow
and on the window choose the color, the size, and spread you want of the glow. Make
sure to keep this layer below the tones layer.

We are done! I know it was a long one, but I hope you
got some knowledge out of it. Any questions or suggestions you can email me at
geekwhale@gmail.com. Until next time! Even if you can't feel your hands don’t stop, keep drawing!
No comments:
Post a Comment